Welcome to Hackafe!
Blog
How to find the ideal channel for your wireless network
If you run a small business, you may share some office space with a few other companies. And if this happens, you may have noticed that those companies have set up and are running their own wireless networks. As the number of networks in the area grows, signal quality degrades, and your Wi-Fi connection will start to behave poorly due to interference. According to NetSpot, interference can also be caused by your router's poor position, by physical obstacles, other wireless appliances and even regular kitchen appliances!
The good news is that you can pick a different wireless channel, which is utilized by fewer people. Because let's be frank and admit that most admins are too lazy to change the default Wi-Fi channel, so most wireless networks will broadcast their signal using channel #6.
Channels #1, #6 and #11 are often the preferred ones; these are the only channels which aren't overlapping in the entire 2.4 GHz band. So, most router manufacturers tend to ship their products with the Wi-Fi radio chips being set to broadcast on channel #6. It may look like a wise move, but it will only deliver the expected results if no other networks are in the area. This is seldom the case, so if signal interference is a serious problem, it's time to choose the least congested channel. Fortunately, there are several tools that will help make this process a breeze.
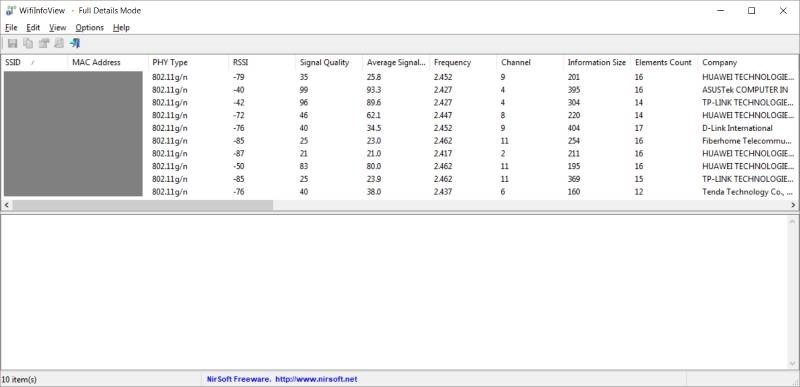
Business users who utilize Windows computers can make use of the WifiInfoView utility to discover the wireless networks in the area, as well as the channels that they are using. Download the application using the link above, unzip it, and then run the executable file; you should see an image that looks like this.
The program will display a lot of useful info: SSID, your network card's MAC Address, PHY Type, RSSI, Signal Quality, Average Signal Quality, Frequency, Channel, Information Size, Element Count, Company, Router Model, Router Name, Security, Cipher, Maximum Speed, Channel Width, Channels Range, BSS Type, WPS Support, First Detection, Last Detection, Detection Count, Start Time, Minimum Signal Quality, Maximum Signal Quality, 802.11 Standards, Connected, Station Count, Channel Utilization, Country Code, Description.
Yes, I know that this is a lot of info, but we're only interested in evaluating the "Signal Quality" and "Channel" values. Routers and access points that belong to other companies and are really close to your router will have big "Signal Quality" values, so we need to avoid using their channels. On the other hand, networks that have signal quality values below 30 can be safely ignored; they are far away, so they can't cause too much damage.
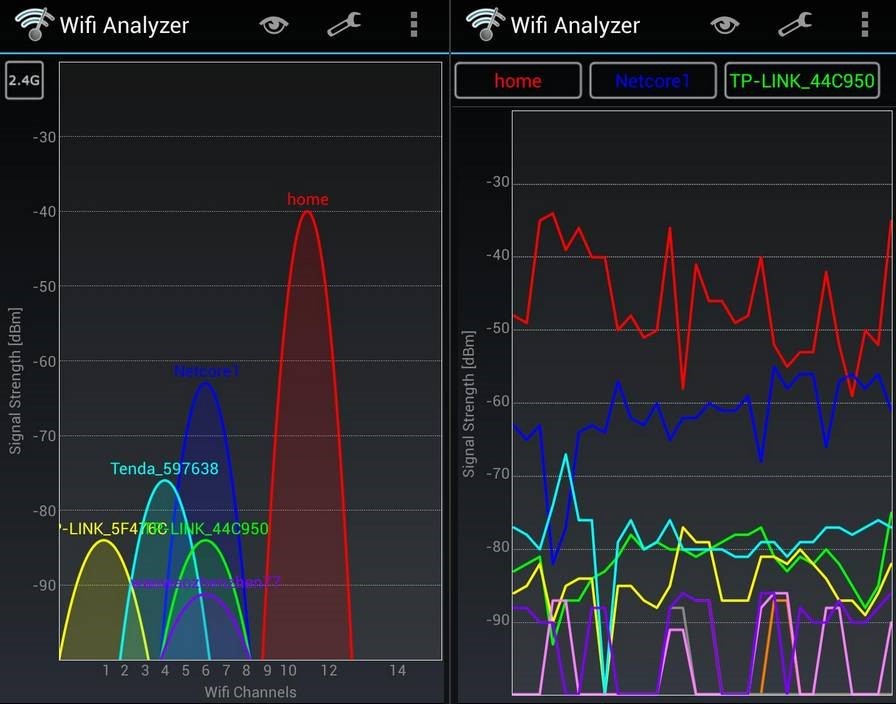
Smartphone users can utilize the excellent Wifi Analyzer app, which can be installed on most modern devices. Run it, and then you will be able to get a lot of information about the wireless networks in the area, including their signal strength and the channel that they are using. By using a portable device (a phone, tablet, etc.) which has the Wifi Analyzer app installed on it, you will be able to determine the strength of all the neighboring Wi-Fi networks in the area without effort. So, this method (using an app that's installed on a mobile device) is the one that I can wholeheartedly recommend.
To change the wireless channel, log into your router's admin panel. Then, access its Wi-Fi section and make the desired change. Pick the least crowded channel; if you've used Wifi Analyzer, the app itself will suggest a list with the best channels that you can use, rating them on a scale of 1 through 10.
Newer routers, which utilize the 5 GHz band, have more channels that don't overlap, and they won't interfere with electronic appliances, which will often use the license-free 2.4 GHz band. So, by purchasing a router which can broadcast signal on the 5 GHz band, you should be able to fix most of those interference-related problems for good.